ls1fbody
Full Access Member
- Joined
- Jan 30, 2010
- Posts
- 263
- Reaction score
- 0
*Excuse my smashed thumb*
Start by jacking up the car and removing both front wheels.
Never support the weight of the car using just the jack, always use jackstands.
Tools Needed
19mm wrench
18mm wrench
No. 6 Allen Key
Removal of Stock Endlinks
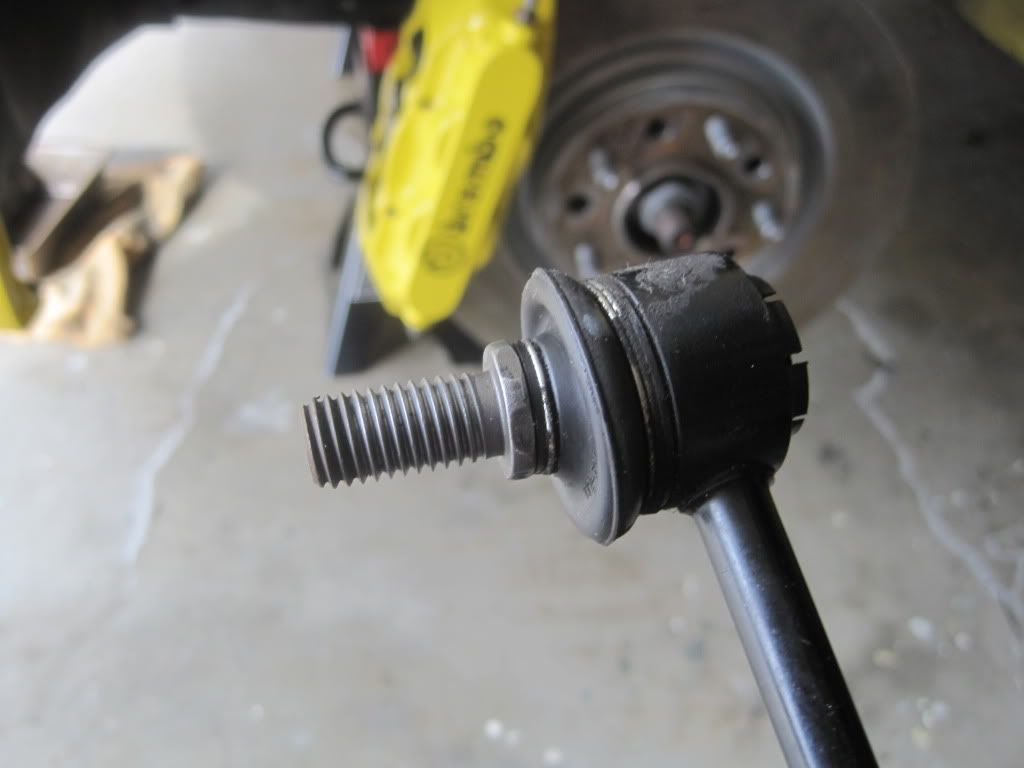
The stock enlinks use an 18mm nut to secure them to the strut and swaybar. Remove both left and right side top nuts first. Your sway bar will slowly fall downward, this is fine. Now remove both lower nuts, and remove the stock endlinks. I didn't have any problems removing them, but there are flat spots on the back side of the ball joint where you could use a thin 16mm wrench or needle nose vice grips if you have an issue with the threaded shaft spinning.
Setting up your Powergrid Adjustable Links
The length at which you set your endlinks is not super critical on a street driven car as long as both sides are set to equal lengths. I found it easiest to just make them as short as possible. After adjustments and tightening down the jamb nuts, mine are 9.5" from the center of each ball joint. The exposed bronze colored rob is 5.5"
Installing Powergrid Endlinks
Start by installing the lower end of both left and right links first. I slipped a 19mm box end wrench over the nut, then inserted the no. 6 allen key into the threaded shaft of the ball joint to keep it from spinning. After it is tightened, it will look like this:
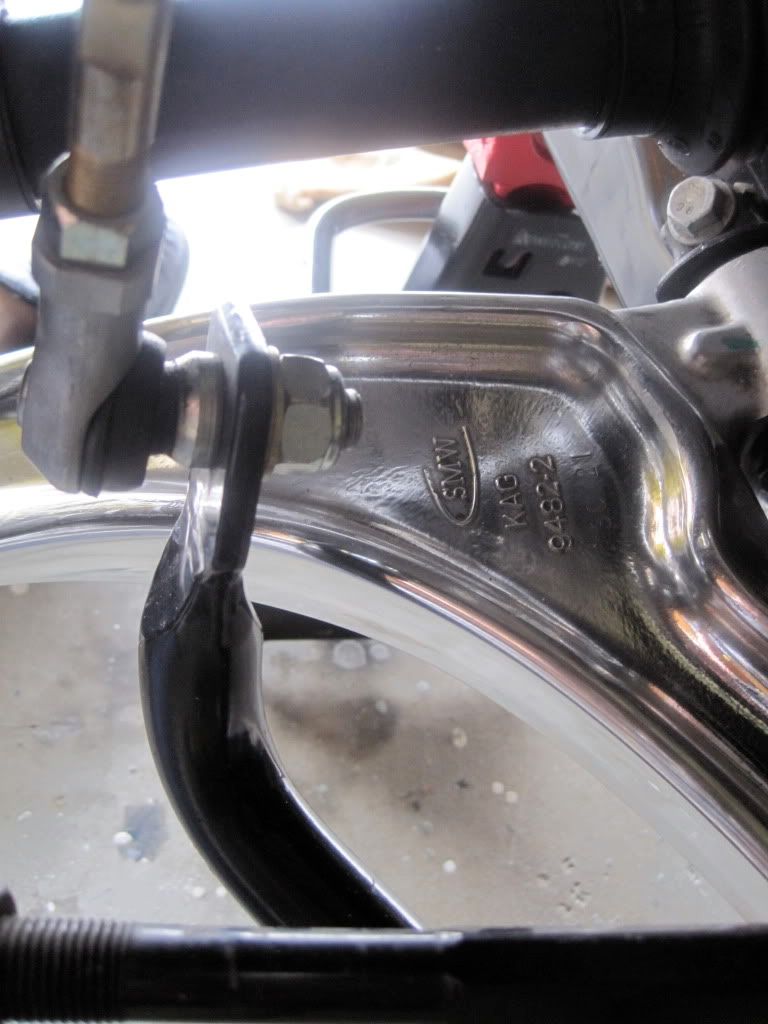
Make sure that the washer is between the nut and the swaybar.
Next, install the top nut of the swaybar link.
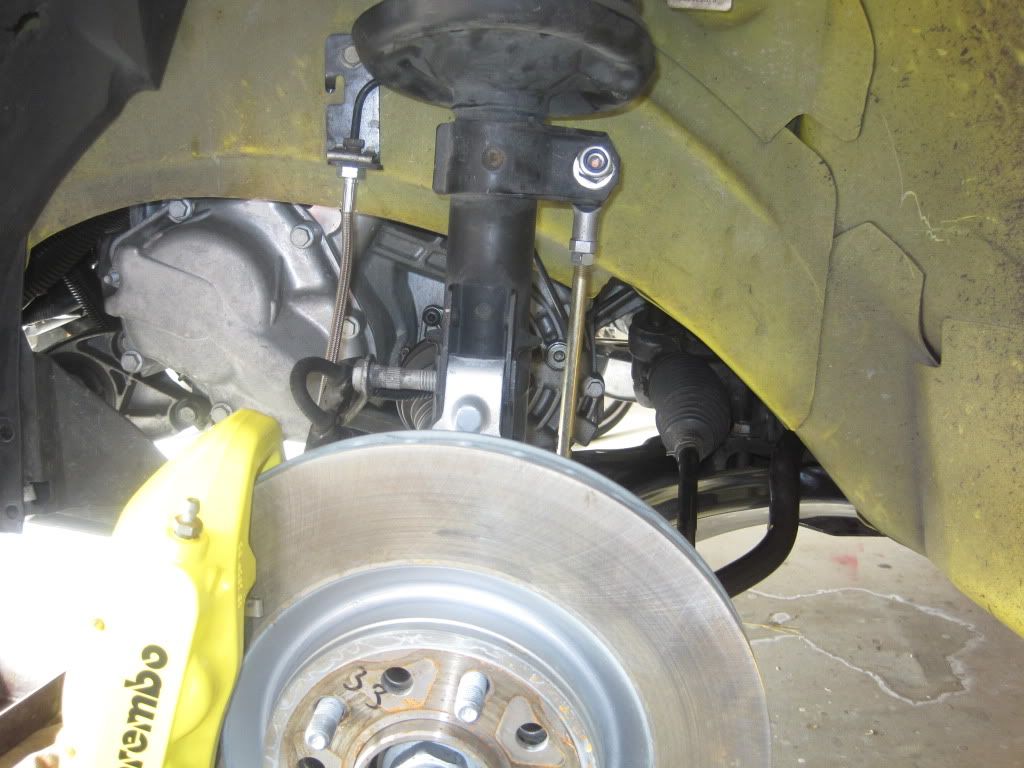
I only hand tightened each side to make sure the lengths matched and allowed the swaybar to be installed without a preload.
Next I tightened the top bolt using the same no. 6 allen key and 19mm box wrench.
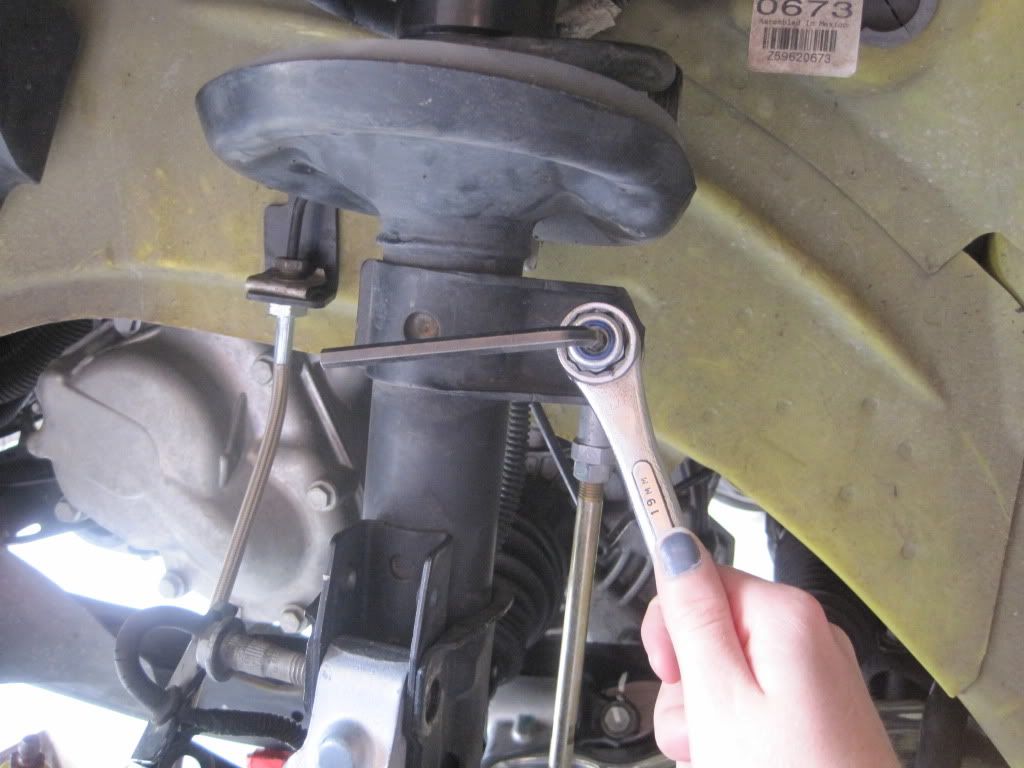
I started on the drivers side, but it really doesn't make much of a difference.
Make a second pass over all of the nuts to ensure they are tight, and now you are done.
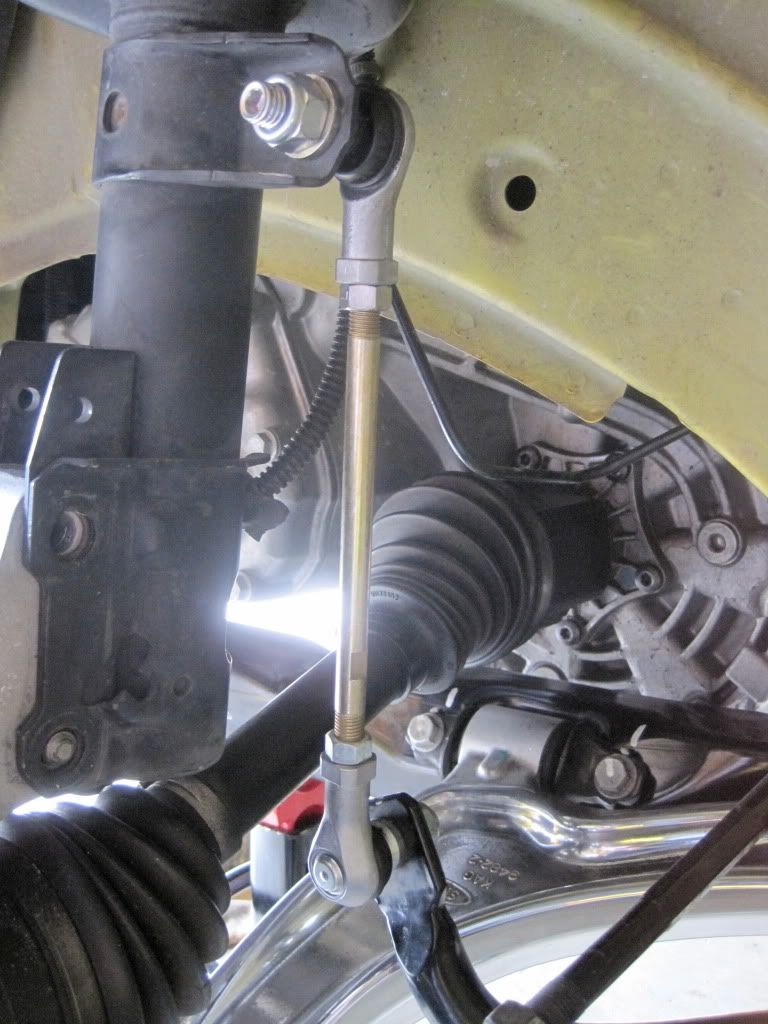
Replace the wheels, lower the car down off the jackstands, and enjoy your clunk-free front end
Start by jacking up the car and removing both front wheels.
Never support the weight of the car using just the jack, always use jackstands.
Tools Needed
19mm wrench
18mm wrench
No. 6 Allen Key
Removal of Stock Endlinks
The stock enlinks use an 18mm nut to secure them to the strut and swaybar. Remove both left and right side top nuts first. Your sway bar will slowly fall downward, this is fine. Now remove both lower nuts, and remove the stock endlinks. I didn't have any problems removing them, but there are flat spots on the back side of the ball joint where you could use a thin 16mm wrench or needle nose vice grips if you have an issue with the threaded shaft spinning.

Setting up your Powergrid Adjustable Links
The length at which you set your endlinks is not super critical on a street driven car as long as both sides are set to equal lengths. I found it easiest to just make them as short as possible. After adjustments and tightening down the jamb nuts, mine are 9.5" from the center of each ball joint. The exposed bronze colored rob is 5.5"
Installing Powergrid Endlinks
Start by installing the lower end of both left and right links first. I slipped a 19mm box end wrench over the nut, then inserted the no. 6 allen key into the threaded shaft of the ball joint to keep it from spinning. After it is tightened, it will look like this:

Make sure that the washer is between the nut and the swaybar.
Next, install the top nut of the swaybar link.

I only hand tightened each side to make sure the lengths matched and allowed the swaybar to be installed without a preload.
Next I tightened the top bolt using the same no. 6 allen key and 19mm box wrench.

I started on the drivers side, but it really doesn't make much of a difference.
Make a second pass over all of the nuts to ensure they are tight, and now you are done.

Replace the wheels, lower the car down off the jackstands, and enjoy your clunk-free front end


