cobalt123
Platinum Member
Disclaimer: I cant take credit for the how-to, if its yours pm me will discuss it there.
Alright guys, there has been much controversy on this and can it be done, how hard is it etc. On a scale of 1-10 with 10 being the hardest this is about a level 6, it takes a lot of time, took me about 5 hours to do both.
Part Numbers:
Front lip: 12336084 dealer cost 178.24 list cost 274.65
Rear Lip: 12336082 dealer cost 190.14 list cost 292.96
Left rear grille: 89025745 dealer cost 27.03 list cost 41.64
Right rear grille: 89025744 dealer cost 43.16 list cost 66.52
All prices are shipped fyi
We will start with the front..
Tools Needed: * = Optional Tool
Flat Head Screwdriver
10mm Socket
7mm Socket
Needle Nose Pliers*
Flashlight*
Dremel
Jack and Jack Stands*
Large Blanket or sheet
Materials Needed:
1 SS/SC front lip
If you are doing this on a 2.2l you will need an SS/SC or SS/NA bumper cover
12 Clips for the lip
4 Push Pins
On to the Instructions:
Step 1: Removing The Headlights
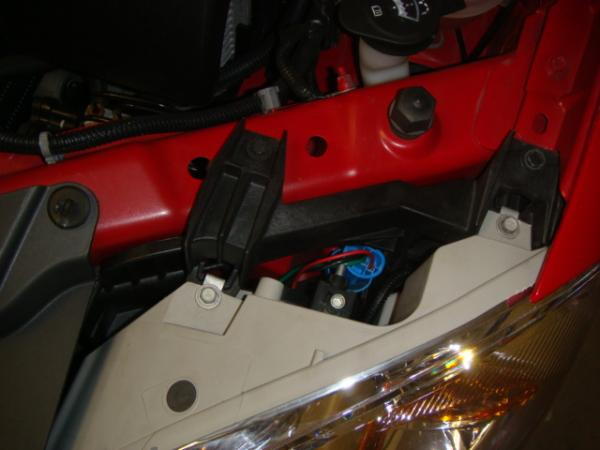
remove the 4 bolts holding the headlight and Headlight Bracket in, and then the light out, this is tricky; just play with it for a while. (10mm)
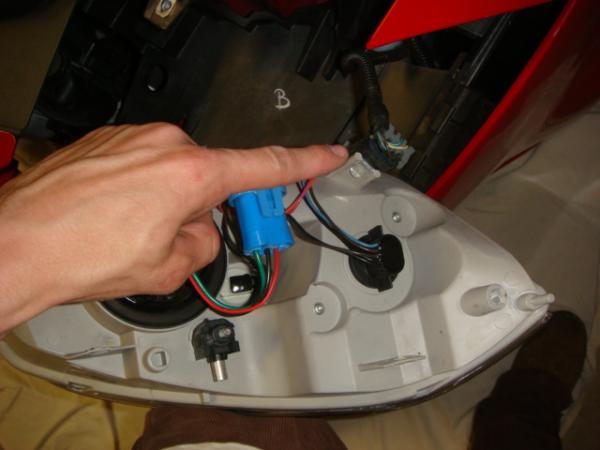
After you wiggle the light out of its place, simply unplug the light and set it to the side.
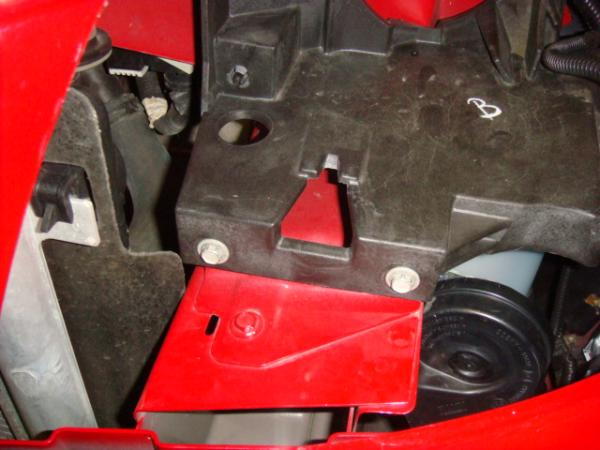
After you get the headlight out there will be 2 more bolts holding the headlight bracket in place; remove them (10mm).
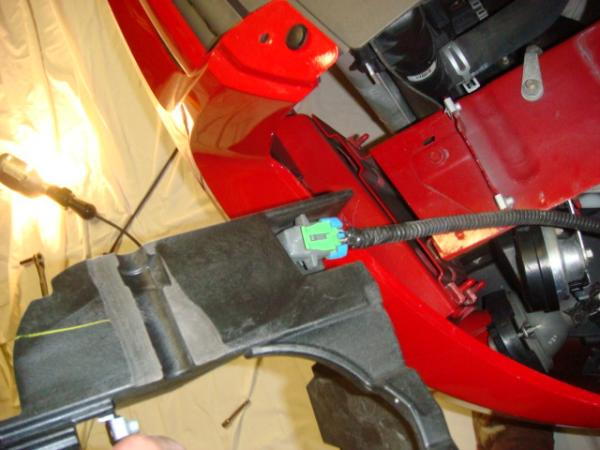
When the bolts are out pull the bracket out of its place but be careful not to pull it out too far because there is a sensor hooked up to the bottom of it, i believe its the outside thermometer. Unplug it and set the bracket to the side with your headlight, and keep in mind this sensor is on the driver side only.
Repeat this step on the other Headlight.
Step 2:removing the Bumper Cover
Jack the car up if you want to, this is not nessecary but it makes everything 100x easier and more comfortable.
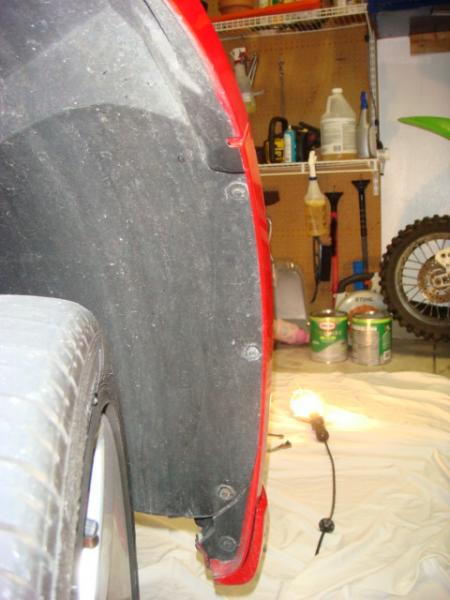
Remove the 4 bolts inside the wheel well (7mm) (you will need to turn the wheel all the)
There will also be 4 7mm bolts underneath the bumper too.
Repeat those 2 steps on the other side of the car.
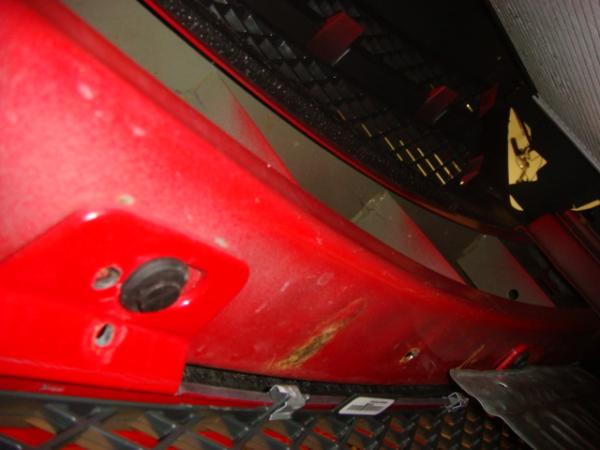
underneath the bumper there will be 2 push pins holding the bumper, pull both of these out.
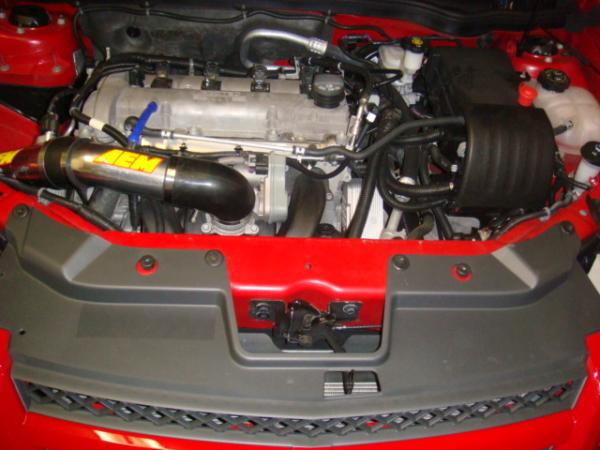
Remove the 4 push pins that are holding your grille in using that flat head screwdriver
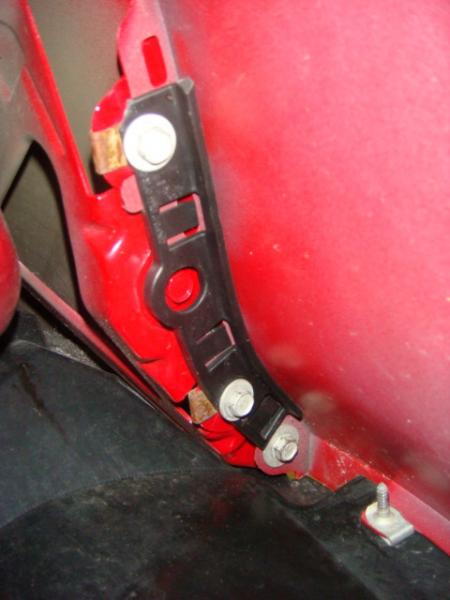
on both sides on the inside of the bumper where the headlights were, there are 3 bolts, the first 2 need to be loosend and the third one needs to be taken out completely.
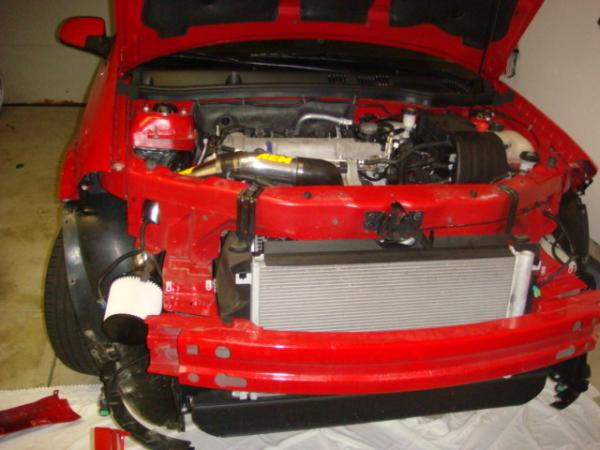
Your bumper cover should now be ready to be removed, so pull it off and set it on the blanket or sheet you brought outside.
Step 3: installing the lip
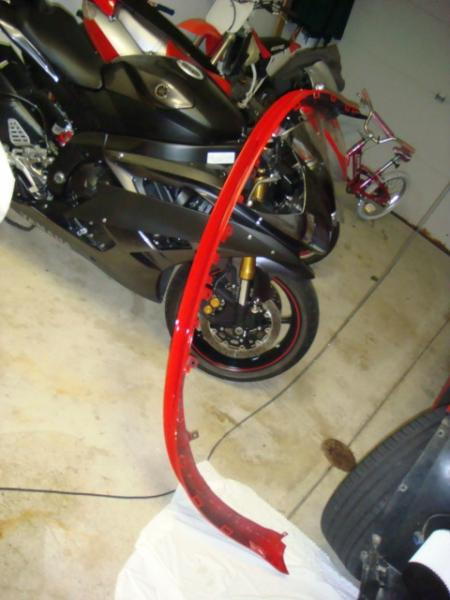
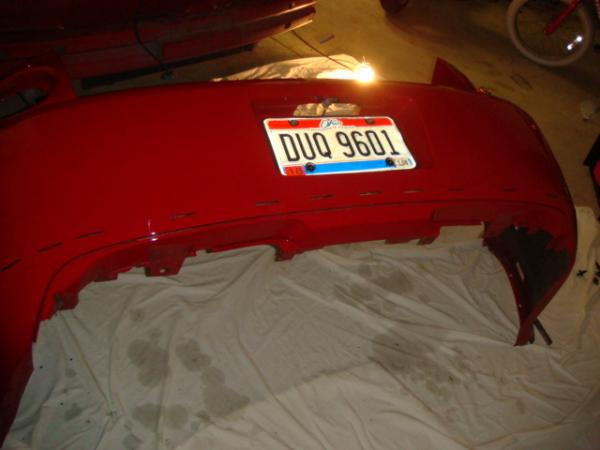
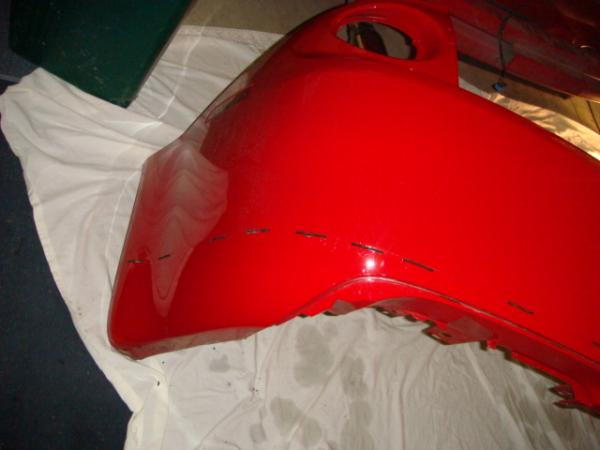
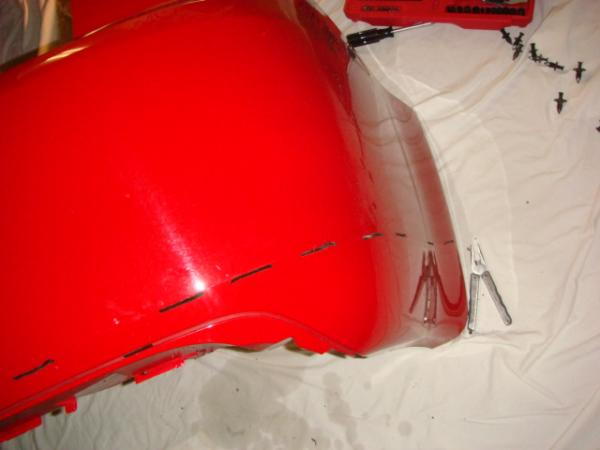
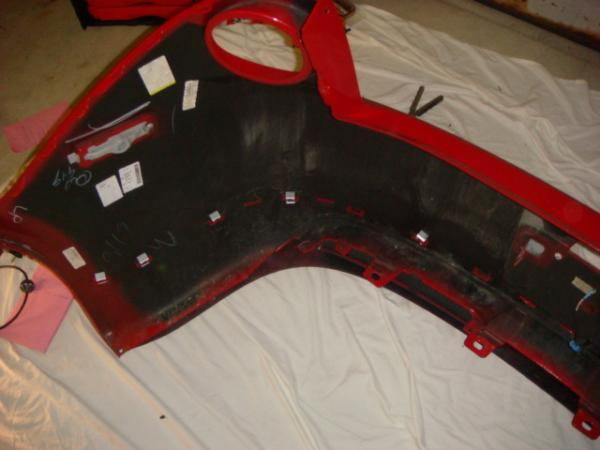
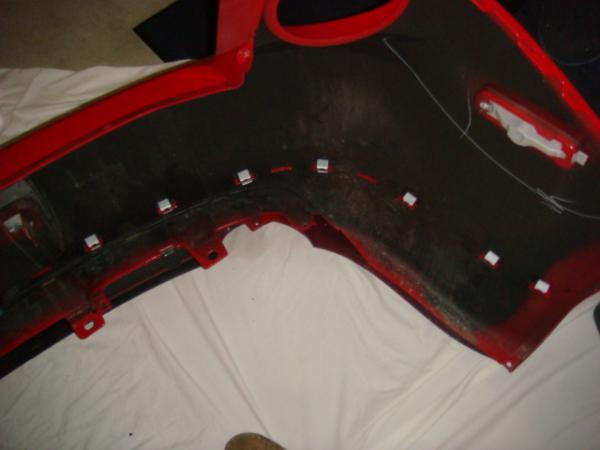
Take your dremel, and cut the slits that are factory marked on the inside of the bumper, i forgot to take a picture but they are very easy to find, when you are done your front bumper should look like this:
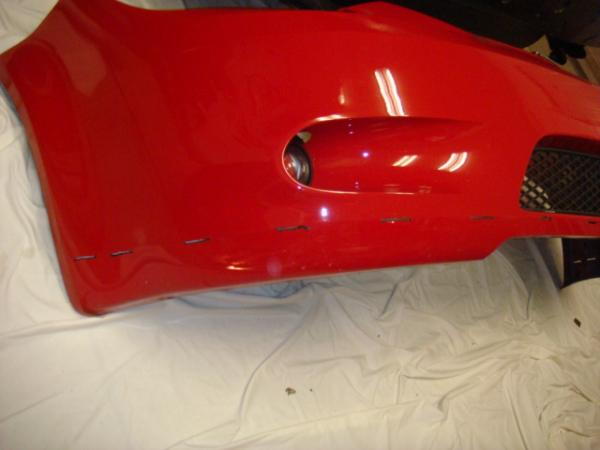
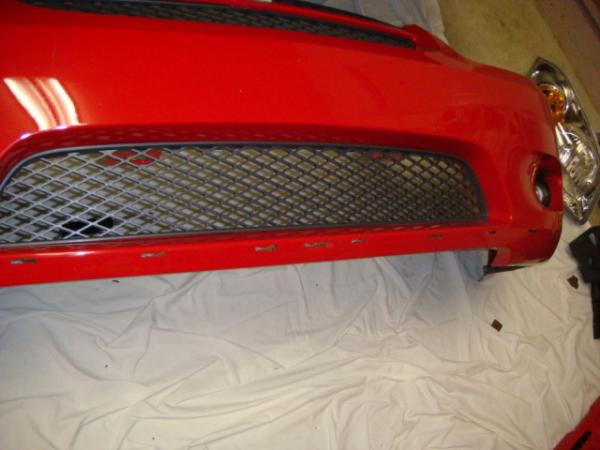
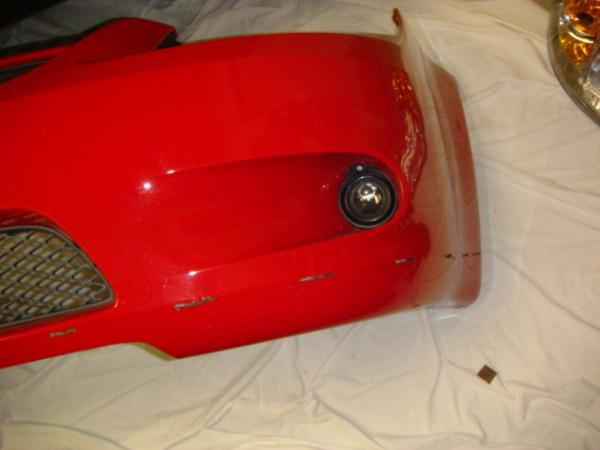
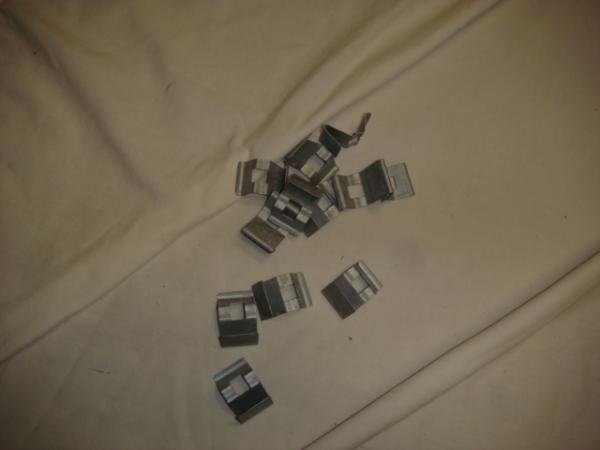
push the lip onto the bumper and count out 12 clips
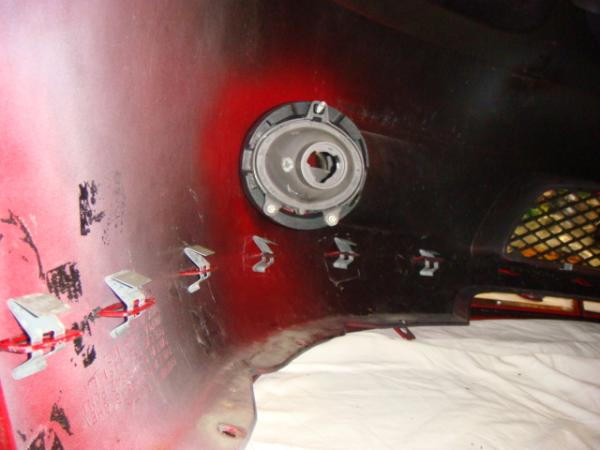
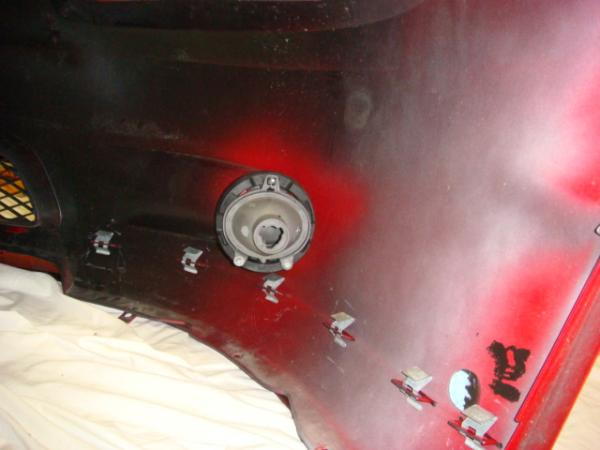
Put all of the clips on
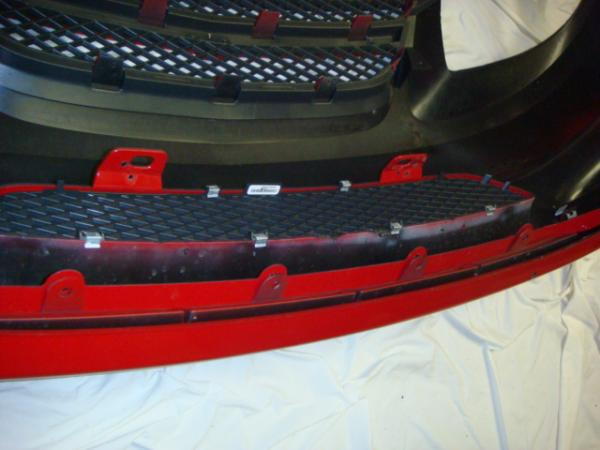
next you have to put 4 push pins in the holes that line up on the bumper and on the lip, there are 4 in a row right in the middle you cant miss em
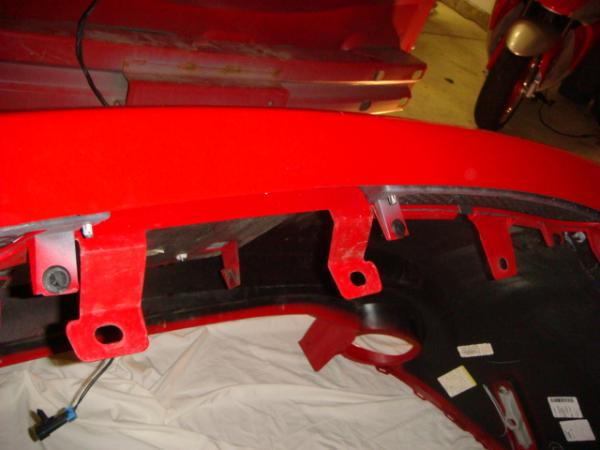
Now you just need to put the bumper back on the way you took it off and put the headlights back in, and it should turn out like this:
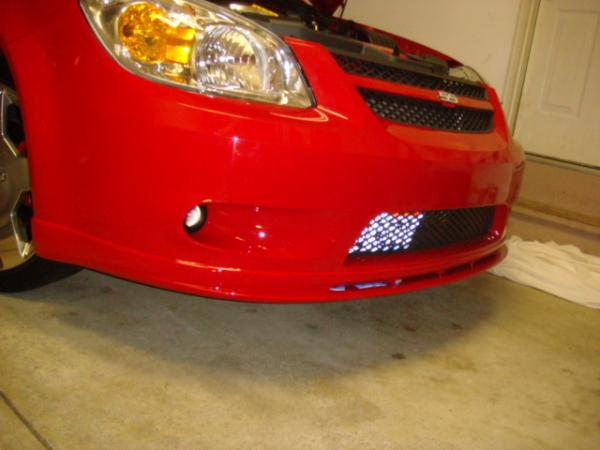
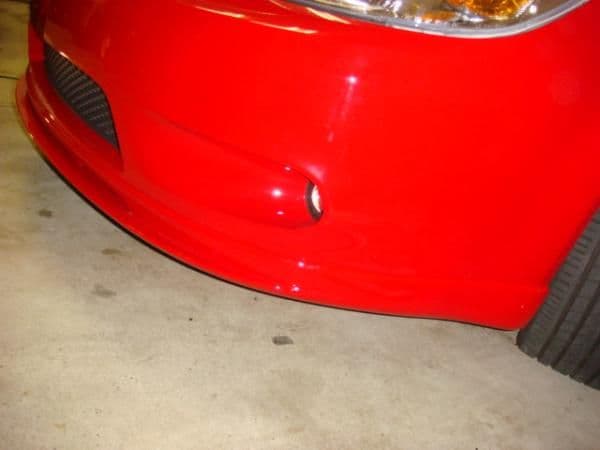
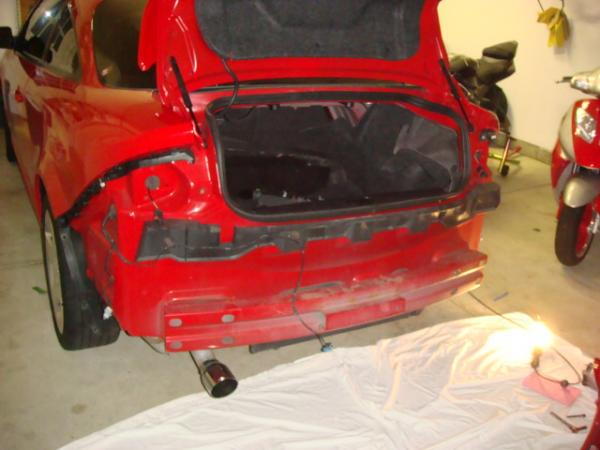
Now take a quick breather and you will be ready to start on the back..
Alright guys, there has been much controversy on this and can it be done, how hard is it etc. On a scale of 1-10 with 10 being the hardest this is about a level 6, it takes a lot of time, took me about 5 hours to do both.
Part Numbers:
Front lip: 12336084 dealer cost 178.24 list cost 274.65
Rear Lip: 12336082 dealer cost 190.14 list cost 292.96
Left rear grille: 89025745 dealer cost 27.03 list cost 41.64
Right rear grille: 89025744 dealer cost 43.16 list cost 66.52
All prices are shipped fyi
We will start with the front..
Tools Needed: * = Optional Tool
Flat Head Screwdriver
10mm Socket
7mm Socket
Needle Nose Pliers*
Flashlight*
Dremel
Jack and Jack Stands*
Large Blanket or sheet
Materials Needed:
1 SS/SC front lip
If you are doing this on a 2.2l you will need an SS/SC or SS/NA bumper cover
12 Clips for the lip
4 Push Pins
On to the Instructions:
Step 1: Removing The Headlights

remove the 4 bolts holding the headlight and Headlight Bracket in, and then the light out, this is tricky; just play with it for a while. (10mm)

After you wiggle the light out of its place, simply unplug the light and set it to the side.

After you get the headlight out there will be 2 more bolts holding the headlight bracket in place; remove them (10mm).

When the bolts are out pull the bracket out of its place but be careful not to pull it out too far because there is a sensor hooked up to the bottom of it, i believe its the outside thermometer. Unplug it and set the bracket to the side with your headlight, and keep in mind this sensor is on the driver side only.
Repeat this step on the other Headlight.
Step 2:removing the Bumper Cover
Jack the car up if you want to, this is not nessecary but it makes everything 100x easier and more comfortable.

Remove the 4 bolts inside the wheel well (7mm) (you will need to turn the wheel all the)
There will also be 4 7mm bolts underneath the bumper too.
Repeat those 2 steps on the other side of the car.

underneath the bumper there will be 2 push pins holding the bumper, pull both of these out.

Remove the 4 push pins that are holding your grille in using that flat head screwdriver

on both sides on the inside of the bumper where the headlights were, there are 3 bolts, the first 2 need to be loosend and the third one needs to be taken out completely.

Your bumper cover should now be ready to be removed, so pull it off and set it on the blanket or sheet you brought outside.
Step 3: installing the lip

Take your dremel, and cut the slits that are factory marked on the inside of the bumper, i forgot to take a picture but they are very easy to find, when you are done your front bumper should look like this:


push the lip onto the bumper and count out 12 clips


Put all of the clips on

next you have to put 4 push pins in the holes that line up on the bumper and on the lip, there are 4 in a row right in the middle you cant miss em
Now you just need to put the bumper back on the way you took it off and put the headlights back in, and it should turn out like this:


Now take a quick breather and you will be ready to start on the back..
Last edited:


