cobalt123
Platinum Member
not my work
Difficulty: Medium
Install Time: 45mins to 1hr
Here are the tools you will need:
1) 2 flat-head screw drivers, preferably of equal length
2) External snap ring pliers
3) A hand ratchet and extension
4) Torx 20 socket
5) Sidecutters
6) 1/8 inch Allen wrench
Here are the contents of the kit you should have:
1) Hurst shifter shaft
2) Pivot point lube
3) Zip-tie
4) Loctite thread locker
5) Crossover ball
6) C-clip/Snap-ring
7) Setscrew
Step one:
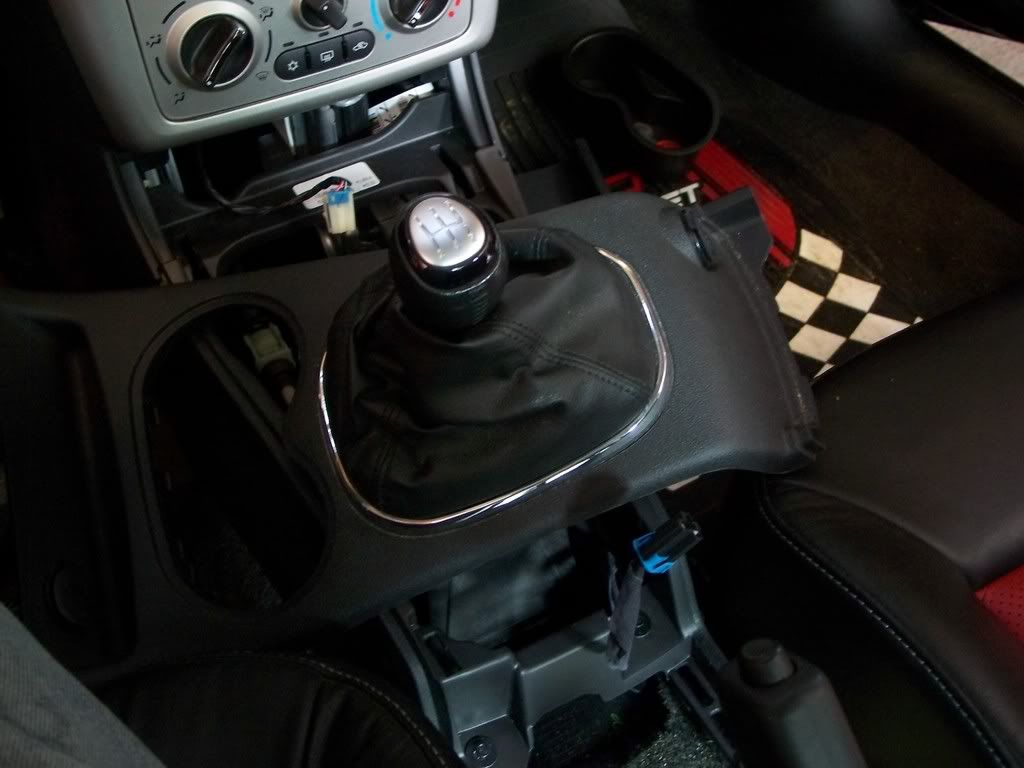
The first step is to remove the center console piece that wraps around the handbrake. To remove this piece, simply tug up on the edge and with minimal force you should be able to detach the clips. Next is to remove the center console piece around the shifter. This is done the same way as the previous part, but this time you need to remove the cigarette/accessory connectors by pressing on the clips on those parts. The shift boot is held on by some clips on the front of the silver ring, push these back and up and it should slide out.
Step two:
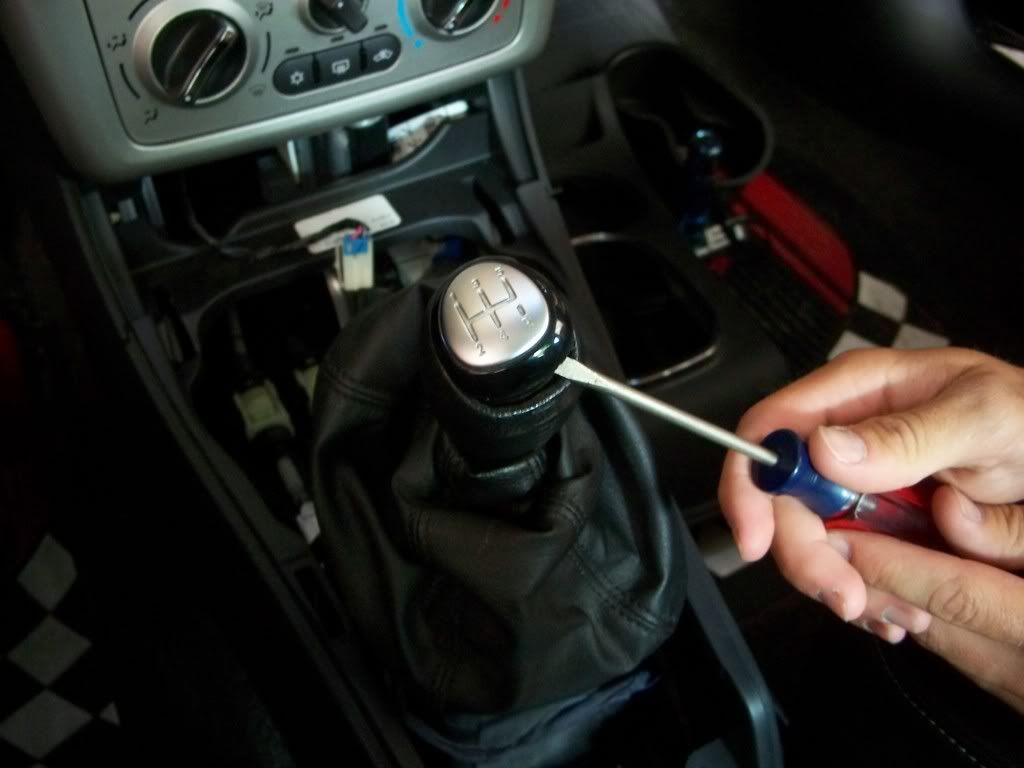
Place the shifter in 4th gear. Next you need to start disassembling the stock shifter to get the boot off. So, first remove the shift pattern piece with a flat-head screwdriver(this should pop off pretty easily).
Step three:
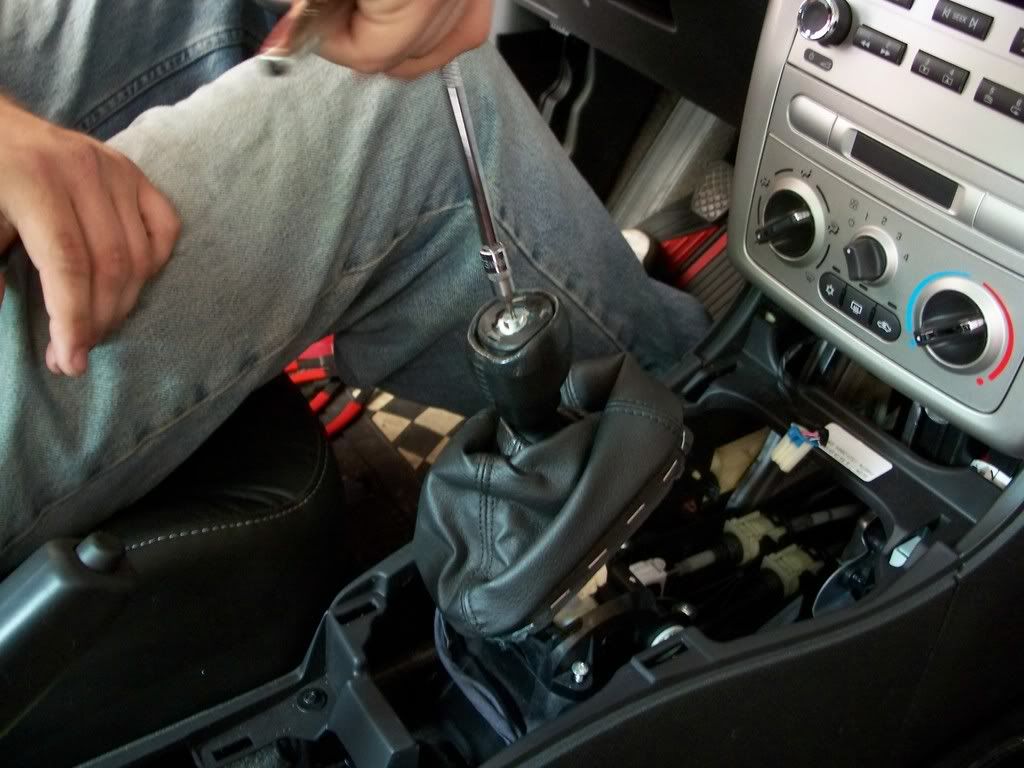
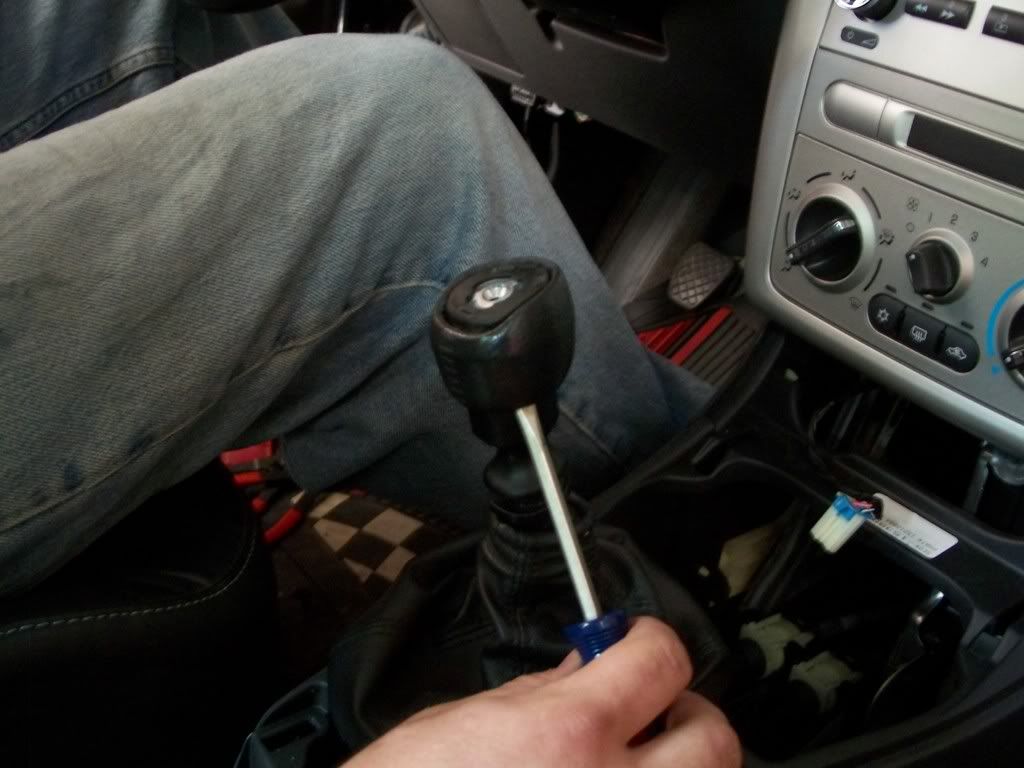
To get the shifter “ball” off, use your ratchet and the torx 20 socket and remove the screw on the top of the shaft. *If you have and 2005, there is no screw here* Then using two screwdrivers pry from underneath of the ball and lift up on the ball. This may take some force and don’t be afraid to try different angles if one isn’t working.
Step four:
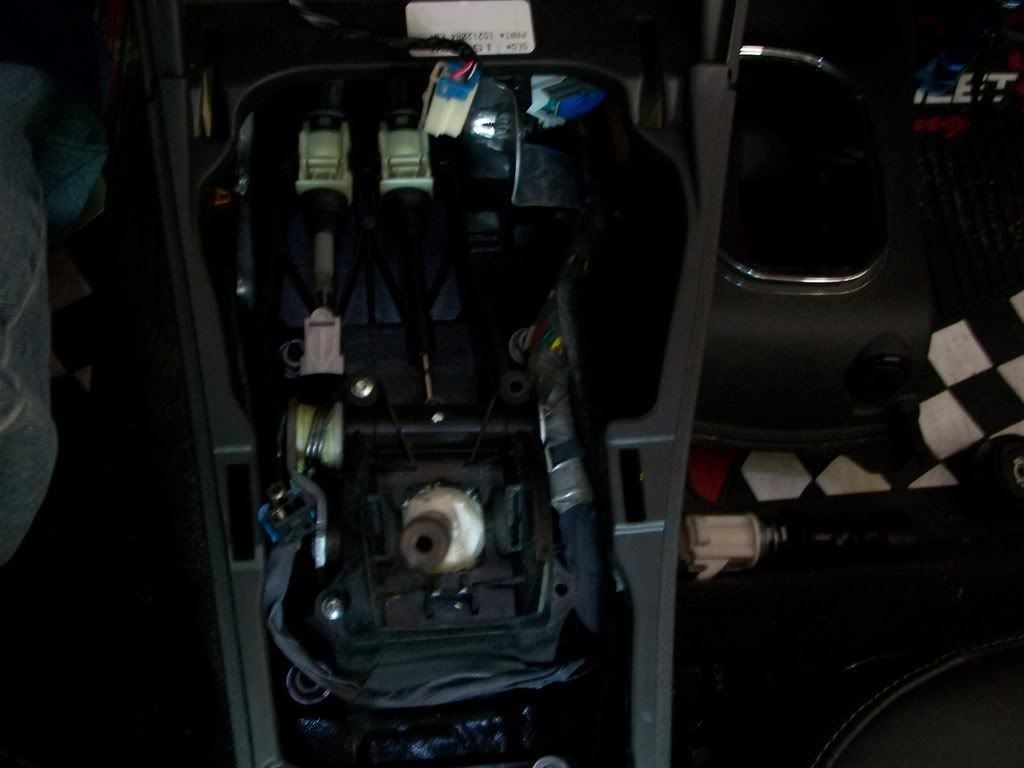
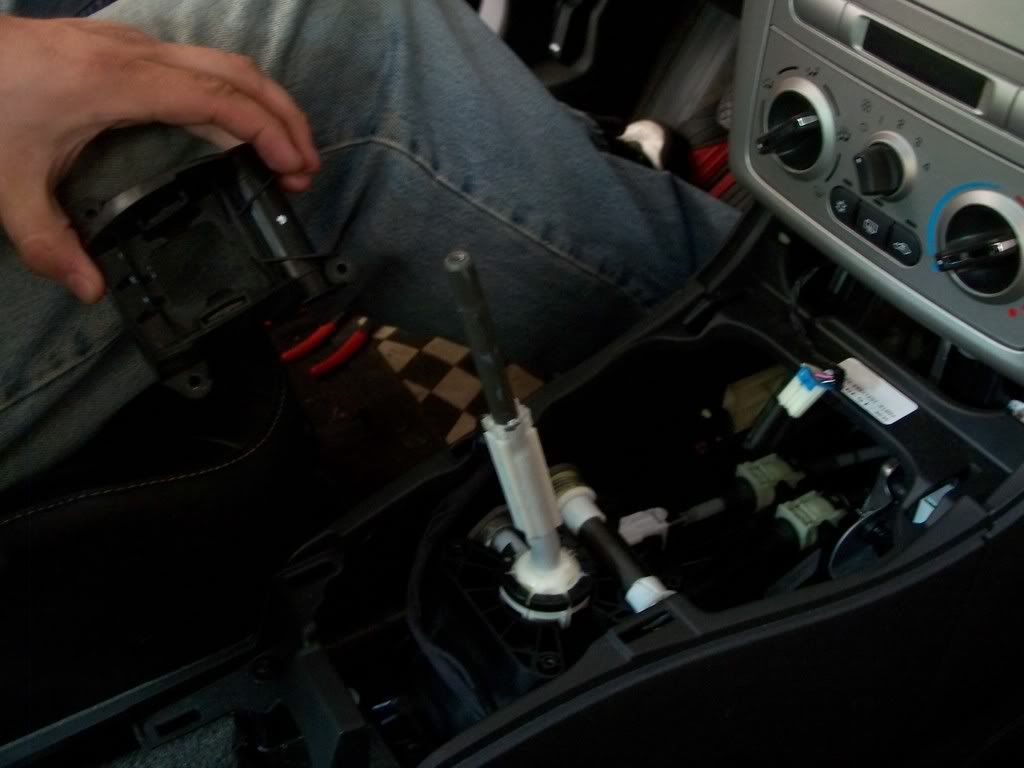
Time to use the ratchet and T20 again. This time, take the four screw out of the base/hold down. In the photo, the two on the right are removed. Keep these as they will need to be reused.
Step five:
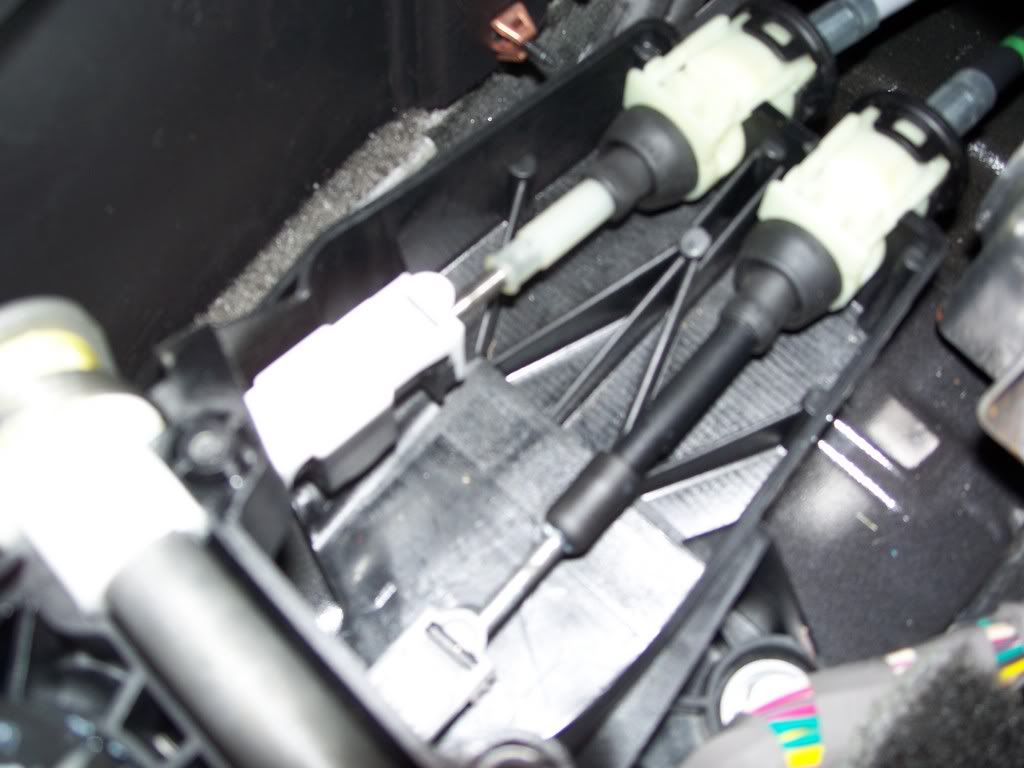
This step can frustrating if you have big hands and little patience. To remove the shifter from the cable, make sure you are still in 4th gear and lift the grey part where the cable slides through up. This may take a few tries. When it is loose, you may bring the shifter forward to remove the cable. Now you may lift the assembly out.
per tuner: " needs to be in there mark the location of the clips on the cable shafts for reference or be fucked for the next 4 hours trying to get the throws right. "
Step six:
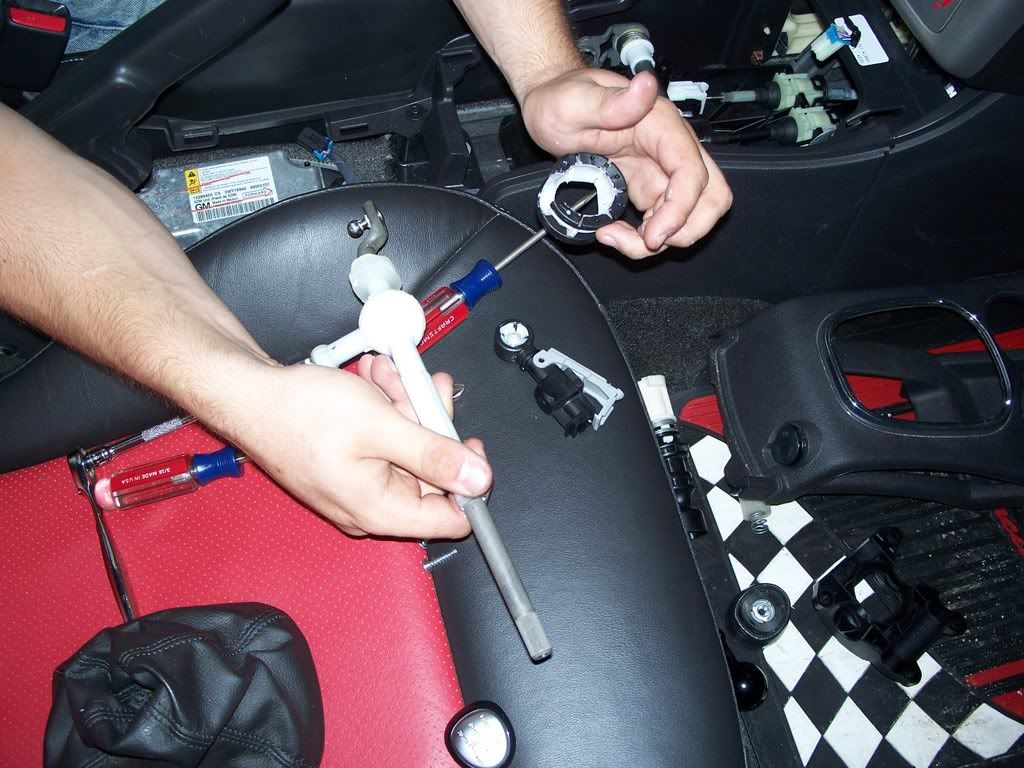
Once the stock shifter is out, remove the cable attachment you just struggled with, this pops off with slight force. Then remove the crossover support(middle white circular part), this too pops off with slight force and then you must bring it past the square piece on the shaft. This takes a lot of force so be careful to not hurt yourself.
Step seven:
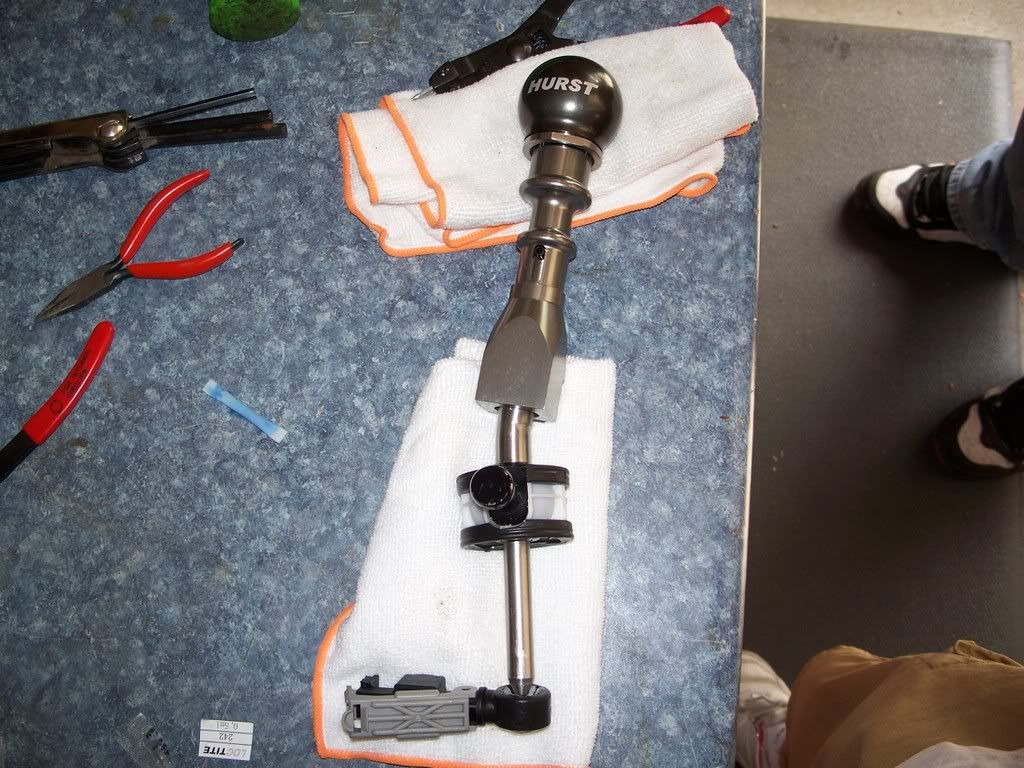
Now you get to start installing the new shifter. Reinstall everything you just took off the stock shifter, starting with the crossover hold down (not pictured due to stupidity on my part). Then the crossover slides onto the shaft and line the set screw hole with the flat part on the shaft. Next push the crossover support/bushing on to the ball. And finally the cable attachment onto the ball on the bottom of the shaft. Should look like this but with the black hold down above the crossover ball.
Step eight:
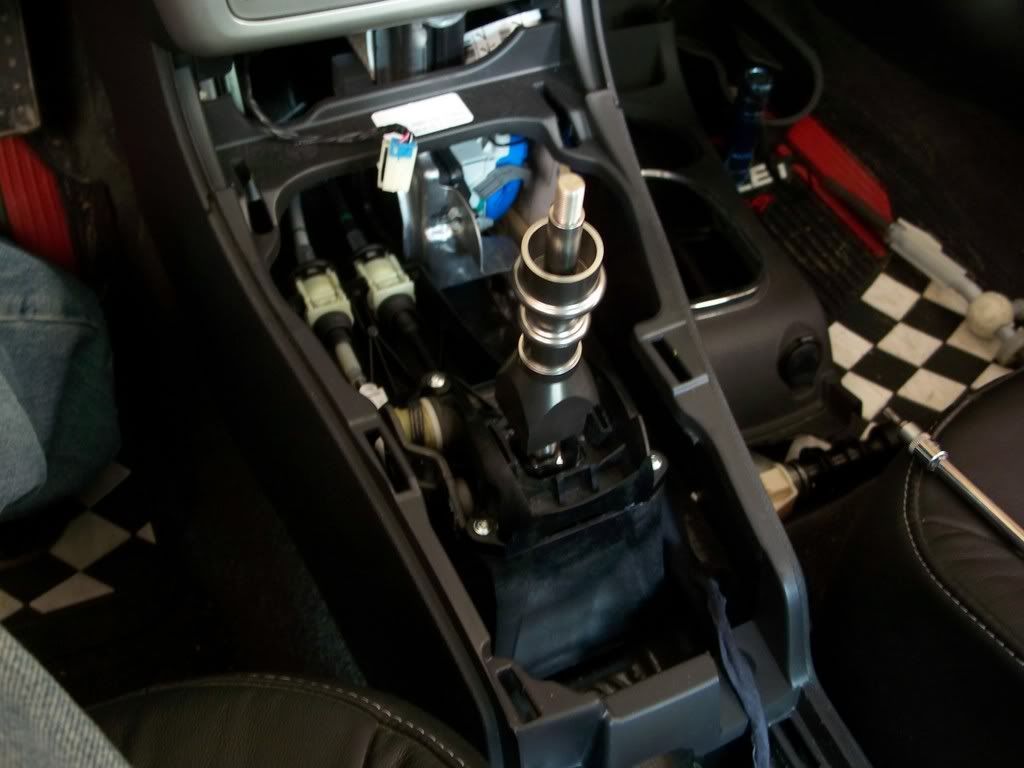
Install the shaft back into its spot and attach the cable again, with the shifter in the 4th gear position remember. And use the four T20 screw you saved earlier into the crossover hold down again. Now is a good time to test out the throws for each gear to see if you are fully engaging each gear, if it is not, then adjust the cable until you get it just right.
Step nine:
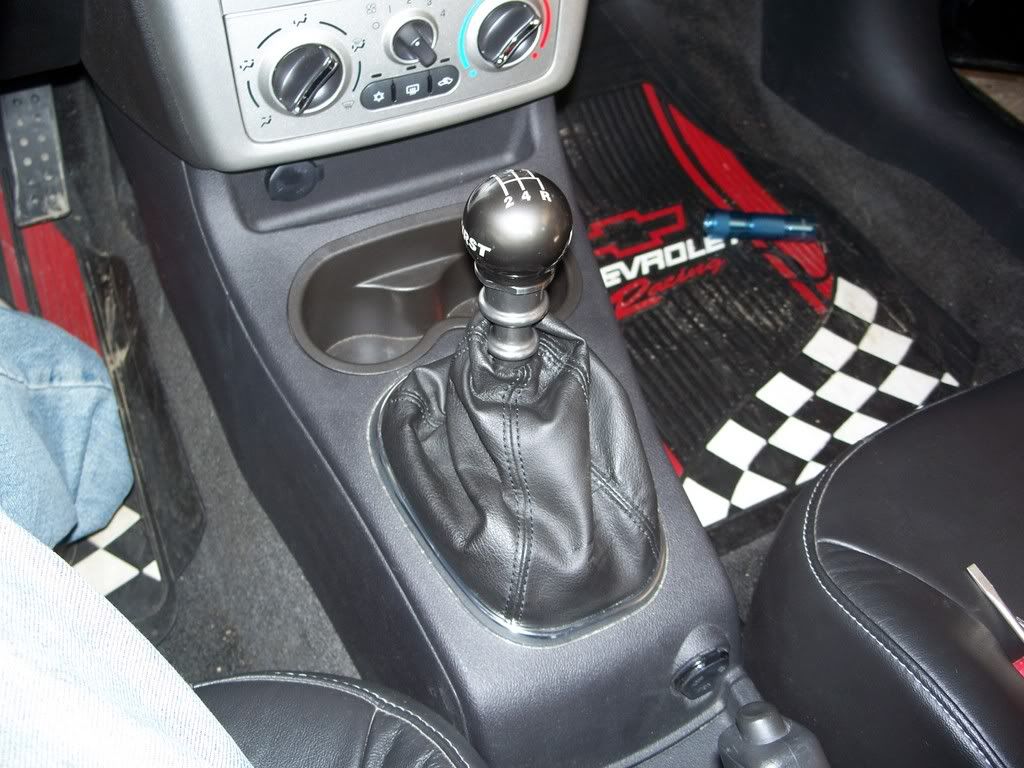
Install the new zip-tie in the collar of the shift boot and install the boot back on the shifter and pull the zip-tie snug and cut off the excess. Then just snap the boot back into the silver ring piece and plug the cigarette/accessory outlets connectors back in. Then just snap the consol pieces back in and you are good to go. Have fun with your new shifter. On 2 of the 3 I have done of these, the reverse lock-out is not used. I don’t know why this is, but all the shifters work perfect.
Difficulty: Medium
Install Time: 45mins to 1hr
Here are the tools you will need:
1) 2 flat-head screw drivers, preferably of equal length
2) External snap ring pliers
3) A hand ratchet and extension
4) Torx 20 socket
5) Sidecutters
6) 1/8 inch Allen wrench
Here are the contents of the kit you should have:
1) Hurst shifter shaft
2) Pivot point lube
3) Zip-tie
4) Loctite thread locker
5) Crossover ball
6) C-clip/Snap-ring
7) Setscrew
Step one:
The first step is to remove the center console piece that wraps around the handbrake. To remove this piece, simply tug up on the edge and with minimal force you should be able to detach the clips. Next is to remove the center console piece around the shifter. This is done the same way as the previous part, but this time you need to remove the cigarette/accessory connectors by pressing on the clips on those parts. The shift boot is held on by some clips on the front of the silver ring, push these back and up and it should slide out.

Step two:
Place the shifter in 4th gear. Next you need to start disassembling the stock shifter to get the boot off. So, first remove the shift pattern piece with a flat-head screwdriver(this should pop off pretty easily).

Step three:
To get the shifter “ball” off, use your ratchet and the torx 20 socket and remove the screw on the top of the shaft. *If you have and 2005, there is no screw here* Then using two screwdrivers pry from underneath of the ball and lift up on the ball. This may take some force and don’t be afraid to try different angles if one isn’t working.


Step four:
Time to use the ratchet and T20 again. This time, take the four screw out of the base/hold down. In the photo, the two on the right are removed. Keep these as they will need to be reused.


Step five:
This step can frustrating if you have big hands and little patience. To remove the shifter from the cable, make sure you are still in 4th gear and lift the grey part where the cable slides through up. This may take a few tries. When it is loose, you may bring the shifter forward to remove the cable. Now you may lift the assembly out.
per tuner: " needs to be in there mark the location of the clips on the cable shafts for reference or be fucked for the next 4 hours trying to get the throws right. "

Step six:
Once the stock shifter is out, remove the cable attachment you just struggled with, this pops off with slight force. Then remove the crossover support(middle white circular part), this too pops off with slight force and then you must bring it past the square piece on the shaft. This takes a lot of force so be careful to not hurt yourself.

Step seven:
Now you get to start installing the new shifter. Reinstall everything you just took off the stock shifter, starting with the crossover hold down (not pictured due to stupidity on my part). Then the crossover slides onto the shaft and line the set screw hole with the flat part on the shaft. Next push the crossover support/bushing on to the ball. And finally the cable attachment onto the ball on the bottom of the shaft. Should look like this but with the black hold down above the crossover ball.

Step eight:
Install the shaft back into its spot and attach the cable again, with the shifter in the 4th gear position remember. And use the four T20 screw you saved earlier into the crossover hold down again. Now is a good time to test out the throws for each gear to see if you are fully engaging each gear, if it is not, then adjust the cable until you get it just right.

Step nine:
Install the new zip-tie in the collar of the shift boot and install the boot back on the shifter and pull the zip-tie snug and cut off the excess. Then just snap the boot back into the silver ring piece and plug the cigarette/accessory outlets connectors back in. Then just snap the consol pieces back in and you are good to go. Have fun with your new shifter. On 2 of the 3 I have done of these, the reverse lock-out is not used. I don’t know why this is, but all the shifters work perfect.

Last edited:

